

How do you celebrate the holidays? Are your trees up before Thanksgiving? Do you decorate every door frame with lights and garland? Do you constantly have Christmas music playing the background? Do you tinsel the heck out of your Christmas tree to give that extra touch of glittery sparkle? How do I celebrate for the holidays, you ask? ALL OF THE ABOVE!!!! Christmas is my absolute favorite. Not only is my house bedecked with holiday cheer every way you turn but my nails are also quite the festive affair during the Christmas season. To me, Christmas time is sparkly and colorful and just plain fun. So why not add a little of that to your nails? Take that Christmas spirit wherever you go. Don’t just leave it in your home. I love glitz, I love color, I love painting my nails!!!! And Christmas is one of my favorite times of the year to paint my nails. There are so many colors to use and designs to recreate. I’m going to show you a few designs I have done to my nails and the best thing is I use regular polish. No fancy lights, gels or decals needed.
Before I start, I want to mention that I am not a nail tech. I have no professional training in nails whatsoever. I just love to paint my nails and usually switch out my design/color 2-3 times a week. I do not know how to do acrylic on my own nails. The nails below are sculpted at a nail salon in a long, coffin shape using acrylic but the designs were painted by me.
Let’s begin!!!
1. Snowflakes
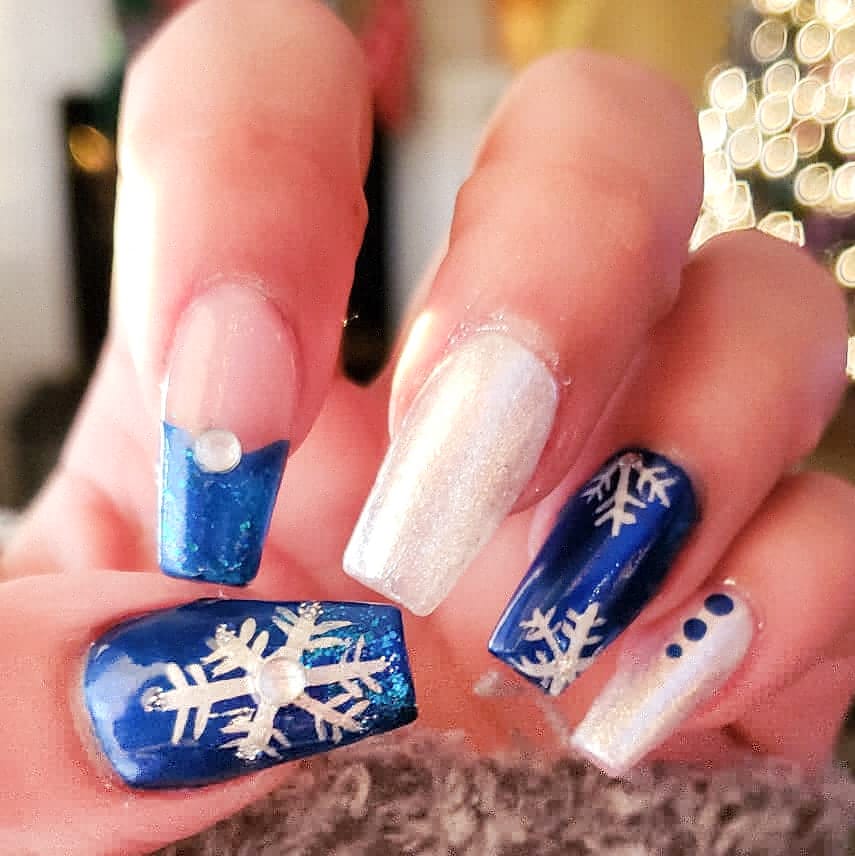
This is probably one of my favorites because I love the color combo of white and royal blue together. It’s so fancy. With most of my designs, I use a combination of various dotting tools and striper brushes. (I will picture those at the end of the post for reference). The jewel on my pointer finger is just a random jewel I had in my stash of nail things. I honestly think I found it at the bottom of my bag. I used a dotting tool to place the dots on my pinky. And a striper brush was used for the snowflakes on my ring finger and thumb. Those two fingers are where the patience needs to kick in.
Start with the longer lines first then add in the tiny ones where you want. Looks like I found another jewel for the center of the big snow flake. Attach with a small dot of nail glue. Top coat and done!
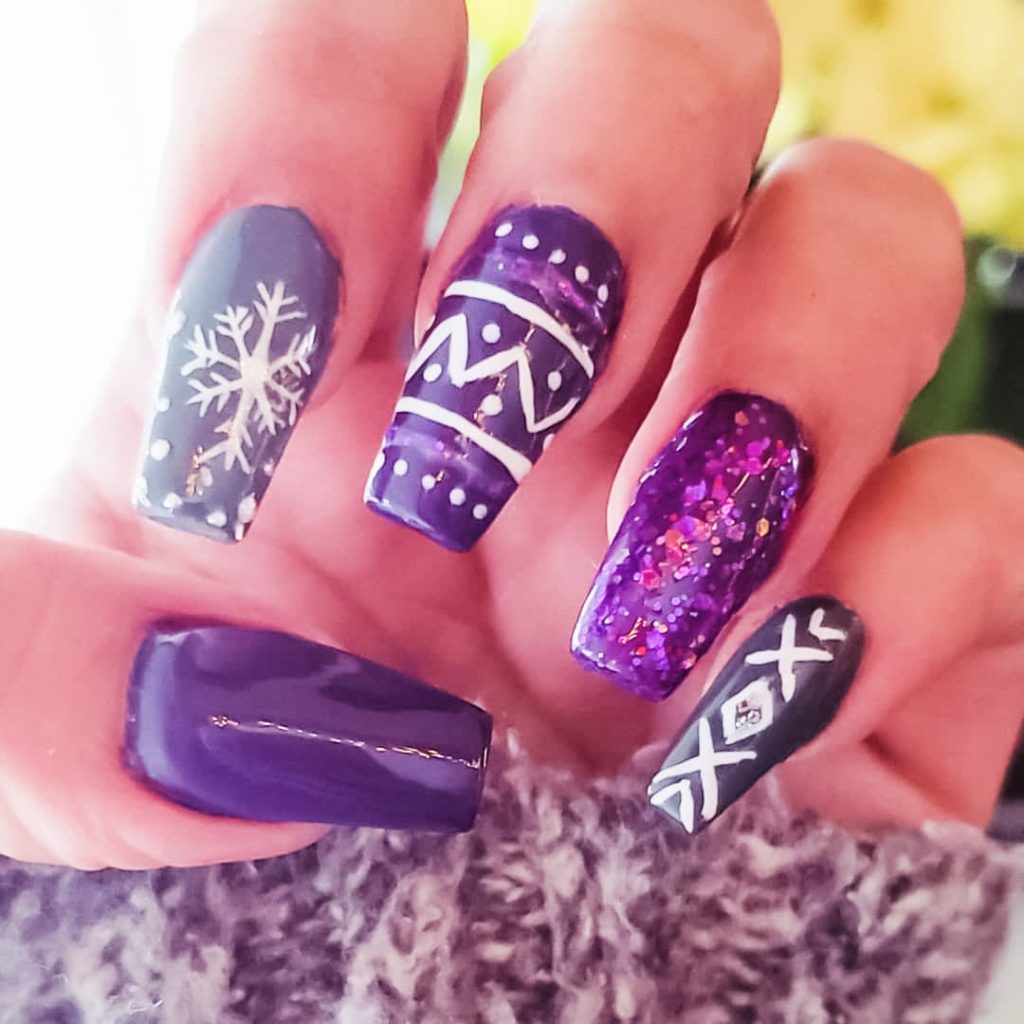
2. Sweater Weather
I call this one sweater weather. The tribal looking print, on my middle and pinky fingers, make me think of a comfy, oversized sweater in the Midwest. Using the same striper brush technique, I created this snowflake and also used the striper for the straight lines, diamond shapes, x’s, and triangle lines. I used a dotting tool for the various dots on my middle finger and for the dot in the center of my snowflake. No jewel this time. I love finding a coordinating glitter to pair on top of a solid color.
Jewel tone nail colors (royal blues, deep purple, dark greens) are absolutely gorgeous with a matching glitter over top. A chunkier glitter is my favorite.
3. O Christmas Tree
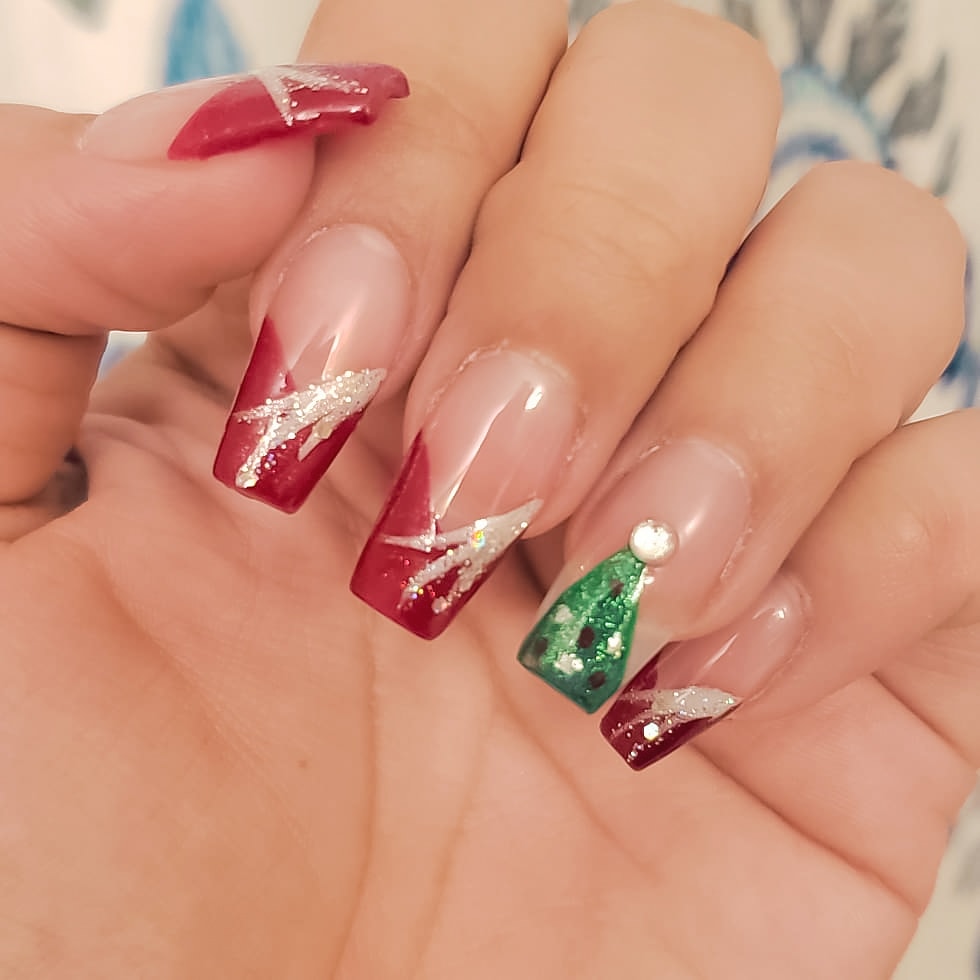
This nail design is a little more traditional in color and design. Red is actually one of my least favorite colors but I make exceptions with nail designs. These are quite easy to do. Freehand the red tips if you’re brave or use some tape for a sharp clean line. Using my trusty striper brush, start at the bottom corner of your red tip and swipe, lightly and freely, your striper brush across the nail in an upward motion. Kinda like when you are sketching something, use a light hand and just go with it.
Don’t think about it or go slow. Your lines will be even and free of dragging or skipping. Vary the way you swipe your brush for those lines. I just used a silver polish as my coordinating color. The tree was done also using a striper brush. Position your hand as it is in the photo. Dip your brush in the green polish and start in the middle, center of your nail and, again using a light hand, swipe the brush down on both sides to make a triangle. Fill in the rest with the green color. Once your tree is dry, use a dotting tool to add in whatever color “ornaments” on your tree. You can use a dollop of gold or silver polish as the tree topper or a jewel like I did here. Easy peasy!
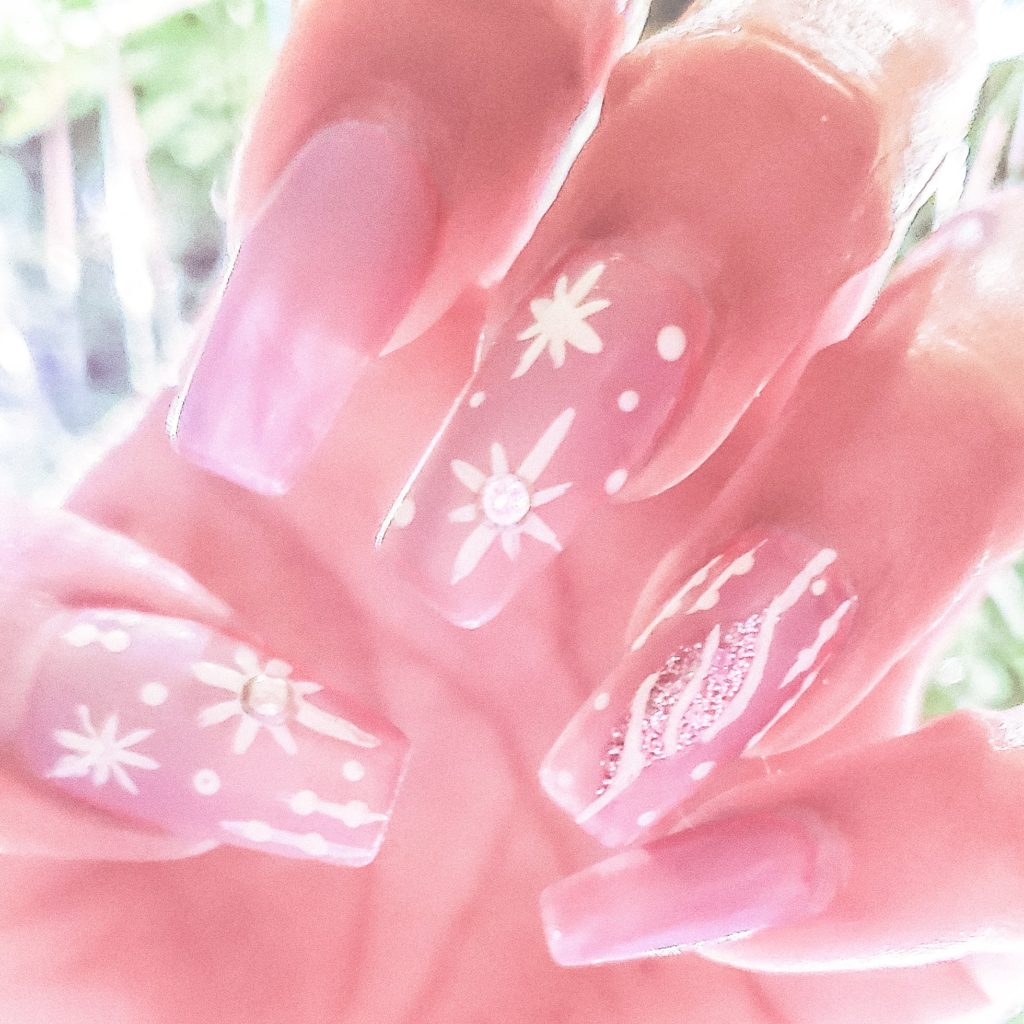
4. Christmas Ornaments
I love this one!!!! The soft lavender color and glitter make these nails extra girly and magical. For this nail design, I did not use top coat. I wanted the glittery ornament on my ring finger to POP! As you can see, two of the nails are just the base lavender color. The other two have more of a Bethlehem star with random snowflakes, dots and icicles. To create the icicles, just swipe a line of white in various lengths and add in a couple tiny dots on them.
The ring finger ornament was a little more challenging but it ended up beautiful, in my opinion. I started with a coordinating chunkier glitter. Position your hand as in the photo, pressing your ring finger tight against your palm to keep it steady. Using your striper brush, outline the shape of the ornament. In this case, kinda like a teardrop but keep both ends pointy. You still with me? This one requires a little extra patience and a steady hand so go slow. Once you have the outline, fill in your shape using the striper. When it dries a little, use your striper, dipped in white polish, to add the white striped lines. Just go with the flow of the ornament. Then add in your icicles and snowflake dots around it. I love keeping this entire design matte because it makes the ornament sparkle and stand out the most.
Striper Brush
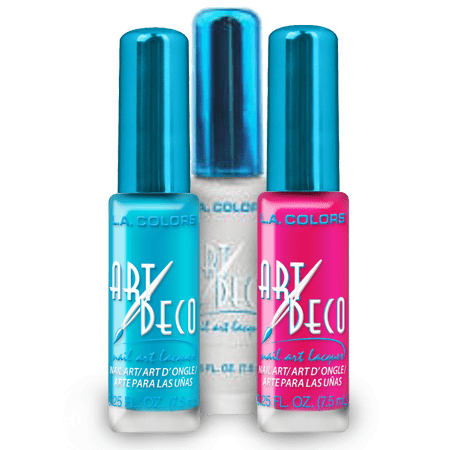
You can purchase this particular brand, Art Deco, in various colors at the Dollar Tree. The brushes on these polishes are my favorite. They don’t splay and they hold their shape through cleanings. As I mentioned, there are a few colors the Dollar Tree offer, but here is a way to use this brush with any other color. I use a spare envelope, or any thick paper. Dollop the color of your choosing on the paper. Wipe the striper brush clean using a cotton pad soaked in 100% acetone. Now it’s ready to use. Don’t overload your brush with polish or it will bead at the end giving you a thicker line then intended. Clean the same way before transferring the brush back to the bottle.

Nail Glue
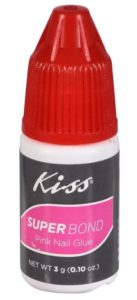
I also purchased this nail glue from Dollar Tree. But honestly, you want to grab the glue with the red top. Same brand, Kiss, but it has a red top and is called Super Bond Pink. It’s the best nail glue out there. Not just for jewels and gems but also for press on nails. Trust me, the best!!!! I was all out of the Super Bond and have been using this for my recent press-on nails…. I’ve already had to glue back 4 nails. GET THE SUPER BOND!!!!
Dotting Tool
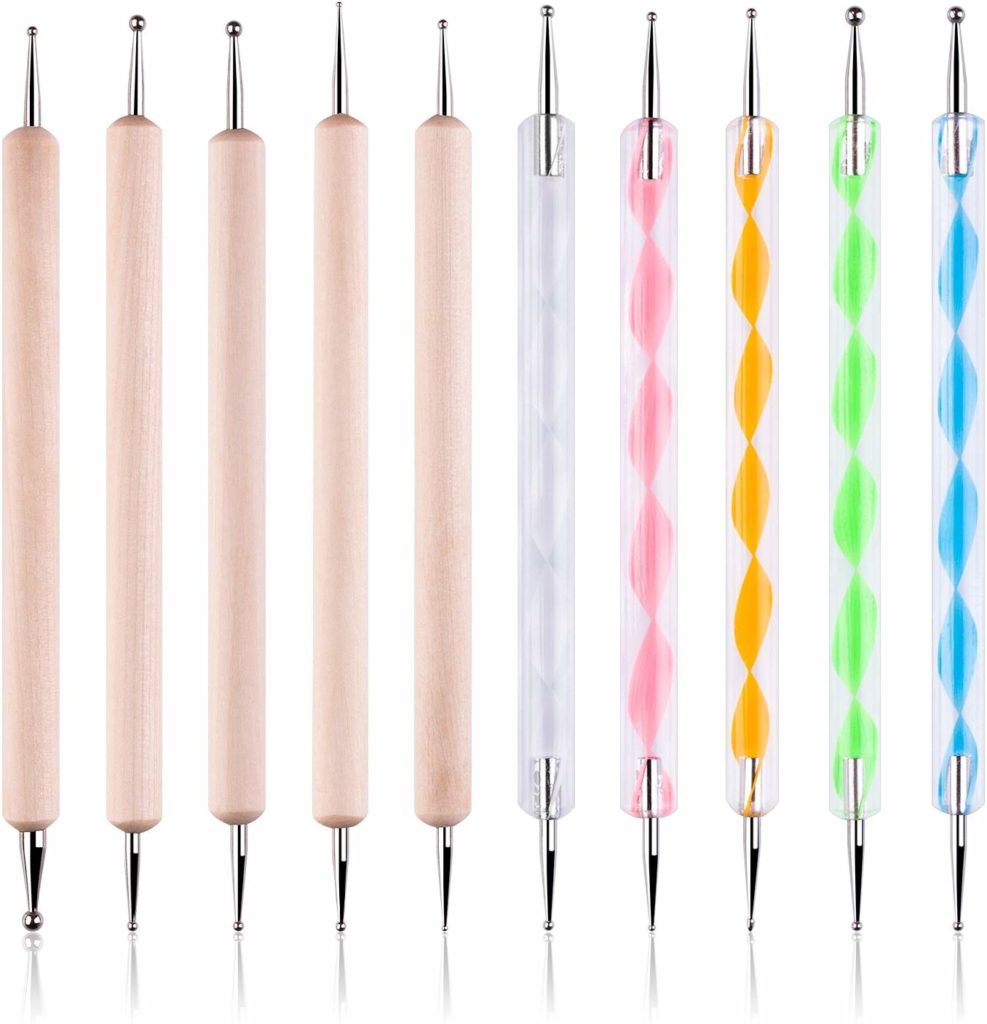
I purchased my dotting tools on Amazon, like these here. You can get a pack of 5 or 6 for just a few dollars. Each brush is dual ended with 2 different sizes so you are bound to find the size you need. Some other options to get the perfect dot are: end of a toothpick, the ball of a bobby pin, or end of a makeup brush…just to name a few. Look around your house and you’re sure to find something that would work for your dotting needs.